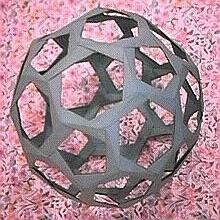
 Modular
origami is a construction technique in which many similar or identical
pieces are individually folded and then assembled together into a model.
For the example shown here, each edge piece is folded from a separate square
of paper, and then the edge pieces slide into each other and interlock
(a method I learned from Jeannine Mosely). The polyhedron is a skewed version
of the truncated icosahedron,
a well-known Archimedean "semi-regular"
solid which provides the pattern used for the soccer ball. Often glueless,
modular origami techniques are described in several of the books listed
in the references.
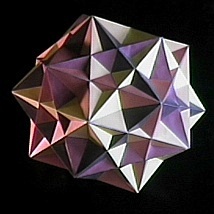 There
are also books you can buy in which the cardboard pages are printed with
full-size pieces to cut out, labeled so that you just glue tab A to A,
and tab B to B, etc. Some of these are excellent, especially for compound
models. This compound of five cubes
I made from one of the cut-and-paste books in the "Tarquin" series, listed
under Jenkins in the references.
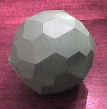 However,
for quickly constructing many polyhedra models, I like the "no-tab, taping"
method (illustrated further below). This pentagonal
hexecontahedron (an interesting example of an Archimedean
dual) is constructed in this manner. Here is a template
you can print out to make your own.
Four techniques
There are four basic cardboard construction techniques. The methods with
glued tabs result in the strongest models, but it is difficult to avoid
visible glue fingerprints. Each of these has its advantages and adherents:
-
Glueless origami methods. This has a certain Zen purity.
-
The no-tab, taping method. It is fastest and easiest to cut paper
polygons and join them using tape on the inside. This is detailed below.
-
The one-tab method. One of the two faces that meet at an edge of
the polyhedron is cut out with a protruding tab. It is folded back and
glued to the inside of the face it joins.
-
The two-tab method. All edges of all faces are cut out with tabs.
Two are glued to each other to make a rib on the inside of each edge. The
advantage of this is in its symmetry and the fact that a clip can hold
the two tabs together as the glue dries and you work on something else.
The no-tab, taping method
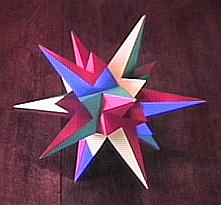 Here
are step-by-step instructions for quickly making paper models. As an illustration,
I am including pictures of this 53rd
stellation of the icosahedron which I made recently. However, this
model is not recommended for the inexperienced; start with the Platonic
solids.
1.) Obtain good (acid free) colored stock from an art supply
store if you want a long-lasting model. Note that inexpensive "construction
paper" and "oak tag" will fade badly in less than a few years (This
was once brightly colored like this.)
I am using five colors in this model.
 2.)
Draw one copy of each face carefully on a piece of paper, or at least locate
the vertices. This will serve as a template. (Here I made two copies because
of its unusual shape; usually one is sufficient. I sized the full
size version to make four faces from a folded sheet of paper.)
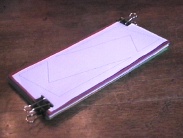 3.)
Stack up pieces of stock and place the paper template on top. A couple
of binder clips will hold everything firmly together. (This model requires
12 pieces (3 folded sheets) of each of five colors.)
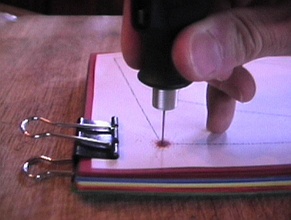 4.)
Use a pin or needle to poke vertically through the stack at each of the
vertices marked on the template. Even better is a very fine drill bit.
(You can replace steps 3 and 4 by simply xeroxing your template onto card
stock or printing from your computer onto card stock, but that costs more
and won't work with stock too thick to go through the machine.)
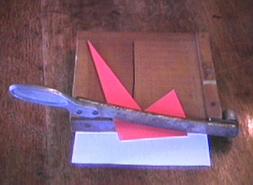 5.)
Using the pinholes as guide points, cut the stock one sheet at a time.
A slicing paper-cutter is quite handy. The white paper under the cutter
lets you see through the holes easily, to line the paper under the knife
for the cut.
 A
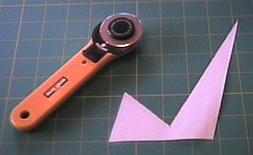
rotary razor cutter (available at quilting supply stores) has the advantage
that it cuts accurately through several layers at once, but it is hard
to end the cut exactly where you want on an inside corner.
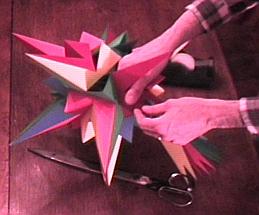 6.)
Tape the faces together on the inside. (For this model, one must keep in
mind the five-color pattern for
the icosahedron, but beginners might start with solid-color models.)
Taping the inside while you are on the outside takes some creativity
for the last few edges. Make an explorer from a bent paper clip to get
inside and secure the tape through the corners.
That's it. Then make a couple more. Decorate your home. Show your friends.
Impress your neighbors. Start a club. Make lots more. Pile them high on
every horizontal surface you own. Put them in large boxes and carry them
with you every time you move. Make even more. They're like tribbles...
After mastering paper, you will be ready to try making
wooden models.
 At
right is one of the 59 stellations
of the icosahedron. It is made by cutting out paper triangles with
tabs on their edges, and assembling with glue. I made it almost 20 years
ago, following plans given in Magnus Wenninger's book Polyhedron Models,
listed in the references. Click on the picture
for a 3D version.
 Modular
origami is a construction technique in which many similar or identical
pieces are individually folded and then assembled together into a model.
For the example shown here, each edge piece is folded from a separate square
of paper, and then the edge pieces slide into each other and interlock
(a method I learned from Jeannine Mosely). The polyhedron is a skewed version
of the truncated icosahedron,
a well-known Archimedean "semi-regular"
solid which provides the pattern used for the soccer ball. Often glueless,
modular origami techniques are described in several of the books listed
in the references.


 Here
are step-by-step instructions for quickly making paper models. As an illustration,
I am including pictures of this 53rd
stellation of the icosahedron which I made recently. However, this
model is not recommended for the inexperienced; start with the Platonic
solids.
 2.)
Draw one copy of each face carefully on a piece of paper, or at least locate
the vertices. This will serve as a template. (Here I made two copies because
of its unusual shape; usually one is sufficient. I sized the
  3.)
Stack up pieces of stock and place the paper template on top. A couple
of binder clips will hold everything firmly together. (This model requires
12 pieces (3 folded sheets) of each of five colors.)
 4.)
Use a pin or needle to poke vertically through the stack at each of the
vertices marked on the template. Even better is a very fine drill bit.
(You can replace steps 3 and 4 by simply xeroxing your template onto card
stock or printing from your computer onto card stock, but that costs more
and won't work with stock too thick to go through the machine.)
 5.)
Using the pinholes as guide points, cut the stock one sheet at a time.
A slicing paper-cutter is quite handy. The white paper under the cutter
lets you see through the holes easily, to line the paper under the knife
for the cut.
 A
rotary razor cutter (available at quilting supply stores) has the advantage
that it cuts accurately through several layers at once, but it is hard
to end the cut exactly where you want on an inside corner.
 6.)
Tape the faces together on the inside. (For this model, one must keep in
mind the